After rumors, speculation, and a closed beta, iOS 16 has arrived. iPhone users can now get their hands on the latest version of Apple’s iOS operating system.
iOS 16 brings with it a plethora of new features designed to enhance the iPhone user experience. From the revamped lock screen to the streamlined Focus tool, iOS 16 moves Apple’s mobile operating system forward in many ways.
However, with any big update comes a learning curve. Even the most seasoned of iPhone users will find themselves asking questions about how certain things work in iOS 16.
As always, Apple has done a fairly good job of explaining what you need to know when you go into apps or new settings for the first time. But if you don’t even know where to start, you might find yourself feeling a bit lost.
One such new iOS 16 feature that users are keen to take advantage of is the ability to hide photos.
Be them private, personal, or sensitive for any manner of reasons, the option to hide specific photos is massively useful. The last thing anyone wants is for someone to stumble across private pictures.
In this article I will be guiding you on how to hide photos on iOS16.
How To Hide Photos On iPhone
You can keep your photos hidden and locked behind a password or FaceID. The idea is to let you keep your more, err, sensitive photos away from any prying eyes or overly ambitious finger swipers.
To use the feature, you simply have to select a photo you want to keep protected in the Photos app, tap the three buttons in the top right corner of the screen, and choose Hide.
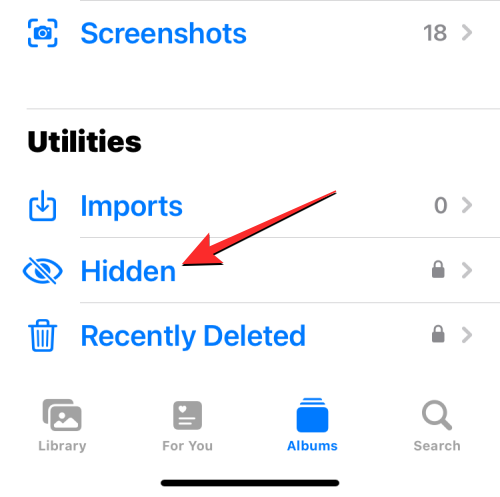
When you want to check out your photo again, you can simply navigate to the Albums tab in photos, scroll down to the bottom of the screen and select Hidden under the Utilities section. You’ll then need to either use FaceID or a passcode to access the hidden album, and bam, you’ve got your photo back.
How To Hide Photos in iOS 16
The option to hide photos is new to iOS 16. The new feature has been well-publicized and it’s something users are keen to implement on their own devices. As a result, many are asking how to hide photos on their iPhone.
iOS is already good at organizing photos in a number of useful ways. However, hiding photos adds a new layer of security to your photo gallery.
Thankfully, securing private pictures is quick and easy.
This is how to hide photos in iOS 16:
- In the Photos app, find the photo you want to hide.
- Select the photo to make it full screen.
- Press the Options icon in the top right corner (three dots in a circle).
- From the drop down, select ‘Hide’ and then press ‘Hide Photo’ at the prompt.

And there you have it – you now know how to add photos to the Hidden album. Your private photo will now be concealed in a secure, eyes-only gallery.

How To Find Hidden Photos in iOS 16
After you have hidden your desired photos, you will no doubt want to find them again.
As you’d expect, iOS 16 does a good job of keeping hidden photos away from prying eyes and separate from your other pictures.

This is how to find hidden photos in iOS 16:
- In the Photos app, select ‘Albums’ from the taskbar at the bottom of the screen.
- From the ‘Albums’ screen, scroll down to ‘Utilities’ at the very bottom.
- Under ‘Utilities’, select ‘Hidden’.
- At the prompt, use Face ID to unlock the Hidden photos album. Here you will find all your hidden photos.
If you cannot see the Hidden album, go to Settings > Photos > Toggle on ‘Show Hidden Album’. The Hidden gallery should now appear under Utilities.
iOS 16 brings a layer of security to your hide photos as it locks them with your Face ID, Touch ID, or passcode. The option is enabled by default, meaning all your hidden pictures and videos on the Photos app will be locked automatically as soon as you hide them on the app.
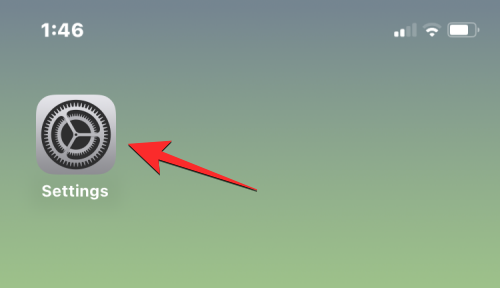
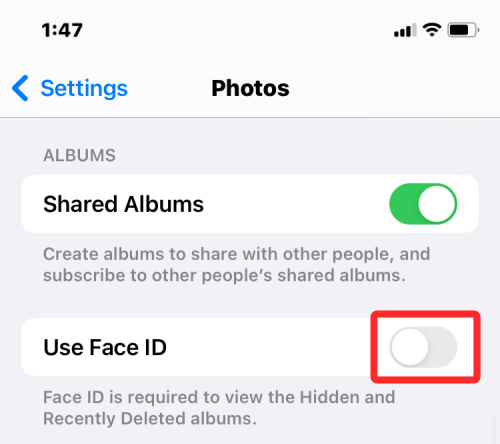
If for any reason, the hidden photos aren’t locked on iOS 16, you can enable the lock for your hidden content by opening the Settings app.
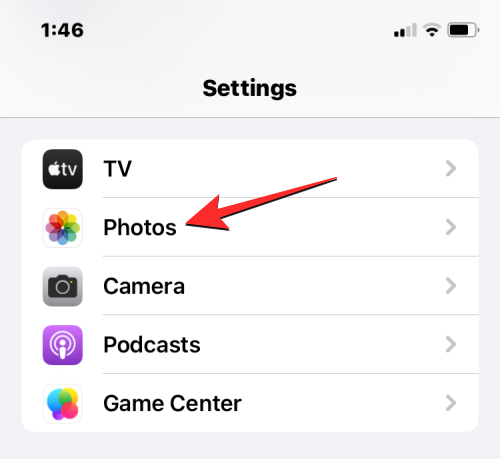
Inside Settings, select Photos.
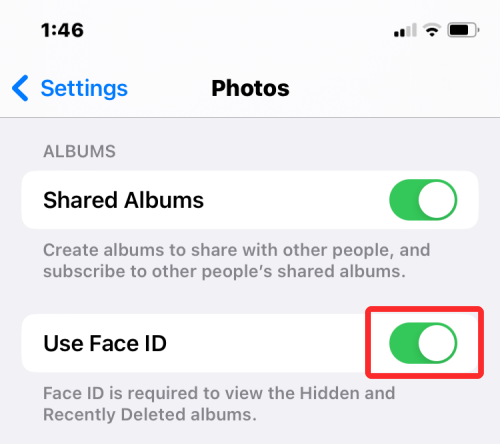
On the next screen, turn on the Use Face ID toggle if you’re on an iPhone that uses Face ID. On the iPhone 8 and iPhone SE models, you can turn on the Use Touch ID toggle to lock your hidden photos.
All your pictures in the Hidden album and the Recently Deleted album will now be locked with your Face ID or Touch ID.
What happens when you hide photos on iOS 16?
When you hide a picture using the Photos app, the picture will disappear from the Library tab on the app. This picture will then be accessible inside your Hidden album which you can get to by going to Photos > Albums > Hidden. Both the pictures and videos you hide using the above methods will appear inside the Hidden Album screen.
On iOS 16, you won’t be able to access your Hidden album unless you unlock it using Face ID, Touch ID, or your iPhone’s passcode.
Yes. Although all your hidden pictures inside the Photos app are locked with Face ID or Touch ID by default on iOS 16, you can manually turn this lock off to send pictures to the Hidden album without any extra layer of security. While we wouldn’t suggest such action as it brings the privacy aspect of your hidden photos down a notch, you can certainly do that by following the same guide as above to get to Settings > Photos and then turn off the Use Face ID / Use Touch ID toggle from here.
When you remove the Face ID or Touch ID lock for your hidden photos, you will be able to access your hidden content much faster but you need to keep in mind that anyone can access them when your iPhone is unlocked.
Conclusion on How To Hide Photos On iPhone New Update
In conclusion, the above information concerning How To Hide Photos On iPhone New Update is comprehensive enough for anyone even a newbie. Now make sure to go through the steps provided in this post, and you will surely come out with the desired result.
Additionally, it is important to carefully follow through with the information above to come up with the desired result.
Be sure to share this post with friends and family.
Robomin is a freelance writer and blogger who covers topics related to Account Creation, gadgets, Refunds, and how to delete An Account. He has a passion for new and innovative technology and enjoys sharing his knowledge with others


